Don't you just love spontaneous projects?
Showing posts with label No budget decorating. Show all posts
Sunday, June 22, 2014
Wednesday, June 18, 2014
Vintage Feedsack Stool

So, there's this little stool...
Thursday, September 12, 2013
Junk Style: DIY Garden Fencing Shade
Don't be offended by what I'm about to say. See this dining room light fixture? Maybe you have one just like it, or similar. Maybe it looks great in your space! I just don't like it in mine.
It just isn't my style. I was after something a little more unique. Something a little...junkier.
I've thought many times about taking it down altogether and hanging my mason jar chandelier here. But we are renting this home, and I just couldn't get totally motivated to take the fixture down knowing I'd have to put it back up if we move. You know me-I also wasn't going to spend any money to buy or make a new fixture!
A couple of nights ago I was looking at some blogs and thinking about how much I love the shape and look of a drum shade over a dining table and inspiration struck! What if I made my version of a drum shade shaped cover to slip over the light fixture I don't like?
It took me about 30 seconds of contemplation before I jumped up and started grabbing together some possible materials for my idea.
I picked up this old garden fencing from a roadside junk pile last Spring. I have made a couple of other hanging chandelier type projects with it, so I thought this might be a good start for something that I could make big enough to slip around the ceiling fixture. I figured out how many panels it would take to fit around it and used needle nose pliers to connect the pieces to each other securely in a circle.

I also had a large scrap of white fabric in my stash. I decided to tear it into strips and hot glued them around the inside of my junk garden fencing frame so the pretty shape of the metal would show on the outside of the shade.
After this, things got a little ugly.
I wasn't sure how I was going to attach the shade to the fixture. Initially my daughter and I tried using the same fabric strips, tying them from the fence shade to the center ceiling chain.
Uuum..no.
I couldn't make the garden fence frame hold it's circular shape, and the fabric strips on the inside of the frame were originally much longer. The whole thing was starting to look like the mummy meets a giant octopus!

Then, another idea. I had picked up two cheap hula hoops at Big Lots when we were in California. What if I attach the junk fence shade to a fabric wrapped hula hoop so it will hold it's shape? Great idea right? Until my 6 year old son walks into the kitchen and sees mom gluing fabric strips to his hula hoop :/
Well, a few unhappy moments (and the promise of another hula hoop) later, he and I were good, the plan was implemented and it worked!
Since tying the shade to the fixture chain with fabric strips just looked too sloppy, I had to come up with another solution. I had this hook with three pieces of chain attached on another hanging piece I made (but wasn't being used) and decided this was a much neater option.
I simply hung the hook directly on the chain. The shade isn't heavy at all, so that wasn't a concern.
To hold the garden fencing to the hula hoop frame, I bent the wire pieces that would get pushed into the ground around the hula hoop. I slipped the ends of the three chain pieces over these to attach the chain to the frame.

I'm working on a few more simple summer-into-fall changes over here that I'll be sharing soon. I hope you'll come back soon for another visit!
Jeanette
Joining these fun parties this week!
Creative Things Thursday at The Vintage Farmhouse
Be Inspired at Common Ground
Share Your Cup Thursday at Have a Daily Cup of Mrs. Olson
Tutorials Tips and Tidbits at StoneGable
Feathered Nest Friday at French Country Cottage
Junkin' Joe at The Cottage Market
Fabulously Creative Friday at Jennifer Rizzo
Party Junk at Funky Junk
Inspiration Monday at I Should be Mopping the Floor
Make It Pretty Monday at The Dedicated House
Metamorphosis Monday at Between Naps on the Porch
Creative Bloggers Party at Homemaker on a Dime
Make the Scene Monday at Alderberry Hill
The Scoop
Inspire Me Tuesday at A Stroll Thru Life
Tweak It Tuesday at Cozy Little House
Wow Us Wednesdays at Savvy Southern Style
What's It Wednesday at Ivy and Elephants
Blissful Whites Wednesday at Timewashed
Treasure Hunt Thursday at From My Front Porch to Yours
The Inspiration Gallery at Craftberry Bush
What to do Weekends at Crafts a la Mode
Junkers Unite at Knick of Time
It's not that there is anything really wrong with it. Just a "builder blah" light fixture. Every time I glance over at it (for over 2
1/2 years!) I think, "That's not right." Haha. As if I don't have
bigger things to think about.
I've thought many times about taking it down altogether and hanging my mason jar chandelier here. But we are renting this home, and I just couldn't get totally motivated to take the fixture down knowing I'd have to put it back up if we move. You know me-I also wasn't going to spend any money to buy or make a new fixture!
A couple of nights ago I was looking at some blogs and thinking about how much I love the shape and look of a drum shade over a dining table and inspiration struck! What if I made my version of a drum shade shaped cover to slip over the light fixture I don't like?
It took me about 30 seconds of contemplation before I jumped up and started grabbing together some possible materials for my idea.
I picked up this old garden fencing from a roadside junk pile last Spring. I have made a couple of other hanging chandelier type projects with it, so I thought this might be a good start for something that I could make big enough to slip around the ceiling fixture. I figured out how many panels it would take to fit around it and used needle nose pliers to connect the pieces to each other securely in a circle.

I also had a large scrap of white fabric in my stash. I decided to tear it into strips and hot glued them around the inside of my junk garden fencing frame so the pretty shape of the metal would show on the outside of the shade.
After this, things got a little ugly.
I wasn't sure how I was going to attach the shade to the fixture. Initially my daughter and I tried using the same fabric strips, tying them from the fence shade to the center ceiling chain.
Uuum..no.
I couldn't make the garden fence frame hold it's circular shape, and the fabric strips on the inside of the frame were originally much longer. The whole thing was starting to look like the mummy meets a giant octopus!

Then, another idea. I had picked up two cheap hula hoops at Big Lots when we were in California. What if I attach the junk fence shade to a fabric wrapped hula hoop so it will hold it's shape? Great idea right? Until my 6 year old son walks into the kitchen and sees mom gluing fabric strips to his hula hoop :/
Well, a few unhappy moments (and the promise of another hula hoop) later, he and I were good, the plan was implemented and it worked!
I simply hung the hook directly on the chain. The shade isn't heavy at all, so that wasn't a concern.
To hold the garden fencing to the hula hoop frame, I bent the wire pieces that would get pushed into the ground around the hula hoop. I slipped the ends of the three chain pieces over these to attach the chain to the frame.
I also trimmed up the fabric strips a bit for a simpler overall shape.
I added a few chandelier crystals I already had to the bottom of the shade, just for a little sparkle.
A new shade from roadside junk and a hula hoop? This is my idea of a junk style drum shade and I'm totally loving it. Why didn't I think of it sooner?
Just so you know, we've been home from our California trip for a week now, and I haven't fully unpacked my suitcase yet! And yet I spend an entire evening making a lampshade out of junk garden fencing. Go figure.
I guess it's not called Creating a Life for nothing ;-)

I'm working on a few more simple summer-into-fall changes over here that I'll be sharing soon. I hope you'll come back soon for another visit!
Jeanette
Joining these fun parties this week!
Creative Things Thursday at The Vintage Farmhouse
Be Inspired at Common Ground
Share Your Cup Thursday at Have a Daily Cup of Mrs. Olson
Tutorials Tips and Tidbits at StoneGable
Feathered Nest Friday at French Country Cottage
Junkin' Joe at The Cottage Market
Fabulously Creative Friday at Jennifer Rizzo
Party Junk at Funky Junk
Inspiration Monday at I Should be Mopping the Floor
Make It Pretty Monday at The Dedicated House
Metamorphosis Monday at Between Naps on the Porch
Creative Bloggers Party at Homemaker on a Dime
Make the Scene Monday at Alderberry Hill
The Scoop
Inspire Me Tuesday at A Stroll Thru Life
Tweak It Tuesday at Cozy Little House
Wow Us Wednesdays at Savvy Southern Style
What's It Wednesday at Ivy and Elephants
Blissful Whites Wednesday at Timewashed
Treasure Hunt Thursday at From My Front Porch to Yours
The Inspiration Gallery at Craftberry Bush
What to do Weekends at Crafts a la Mode
Junkers Unite at Knick of Time
Monday, July 15, 2013
Christmas in July-Vintage Style Wall Hanging
Anyone care to guess why I was painting a cereal box at 10:00 at night?
Honestly, when I saw that the gals at Knick of Time, Bliss Ranch
and My Salvaged Treasures were hosting a "Christmas in July" party I thought, "That's nice. Have fun with that!" : )
I wasn't ready to think much about Christmas, and I determined that I'd have fun looking at the party, but I wasn't going to participate.
So what happened??
I don't know! The party went up tonight, I started poking around and I thought, "Hey, it might be kind of fun to make something Christmas-y...". Which quickly turning into, "I MUST make something Christmas-y! Right now." Sure, I could have shared a project from last year, but...
Here's what I did:
Back in January I showed you how I made these recycled paper wreaths starting with a cardboard forms cut from cereal boxes.
Tonight, I decided to put another little project together using a recycled cereal box.
Did you know you can turn cereal boxes inside out? Are you a little worried about me because I know you can turn cereal boxes inside out? Haha
Carefully open the bottom flaps. You want to try not to wrinkle the cardboard if you can help it. Open the side of the box where it's glued by running your finger along the inside of the seam.
Fold it all back together inside out, sealing it with hot glue. Why not just paint the box on the outside? Well, it's glossy and colorful, making it harder to cover over with paint. Also, I just love the possibilities of the plain brown box.
I can think of alot of different ways to put this together, including leaving the plain brown box. But I decided I wanted to create more of a contrast, and a weathered looking surface to this little project, so I painted front and sides of the box with regular black craft paint.
I forgot to take a "during sanding" photo, but you can see the result. Did you know you can sand painted cardboard?
I lightly sanded over the whole surface and then sanded most of the paint away around the corners and edges of the box.
I went to my paper stash and grabbed a Christmas song page from an old hymnal and a cute vintage looking image of a girl with a bird. I tied some white string around it, hinting at the look of a Christmas package. I added a tiny glittered pine sprig, and a rustic metal star.
I really dislike taking indoor photos at night! But what are you gonna do when you have a sudden desire to go to a Christmas party?
I punched a small hole in the back of the box and hung it on a nail inside a weathered white frame.
Why did I suddenly feel compelled to create a Christmas craft from a cereal box at 10:00 at night in the middle of July?
Sometimes blogging makes you do weird things.
Come check out the Christmas party!

See you soon, friends!
Jeanette
Sharing this week over at:
The Scoop at The Farmhouse Porch
Metamorphosis Monday at Between Naps on the Porch
Nifty Thrifty Tuesday at Coastal Charm
Christmas in July
Honestly, when I saw that the gals at Knick of Time, Bliss Ranch
and My Salvaged Treasures were hosting a "Christmas in July" party I thought, "That's nice. Have fun with that!" : )
I wasn't ready to think much about Christmas, and I determined that I'd have fun looking at the party, but I wasn't going to participate.
So what happened??
I don't know! The party went up tonight, I started poking around and I thought, "Hey, it might be kind of fun to make something Christmas-y...". Which quickly turning into, "I MUST make something Christmas-y! Right now." Sure, I could have shared a project from last year, but...
Here's what I did:
Back in January I showed you how I made these recycled paper wreaths starting with a cardboard forms cut from cereal boxes.
Tonight, I decided to put another little project together using a recycled cereal box.
Did you know you can turn cereal boxes inside out? Are you a little worried about me because I know you can turn cereal boxes inside out? Haha
Carefully open the bottom flaps. You want to try not to wrinkle the cardboard if you can help it. Open the side of the box where it's glued by running your finger along the inside of the seam.
Fold it all back together inside out, sealing it with hot glue. Why not just paint the box on the outside? Well, it's glossy and colorful, making it harder to cover over with paint. Also, I just love the possibilities of the plain brown box.
I can think of alot of different ways to put this together, including leaving the plain brown box. But I decided I wanted to create more of a contrast, and a weathered looking surface to this little project, so I painted front and sides of the box with regular black craft paint.
I forgot to take a "during sanding" photo, but you can see the result. Did you know you can sand painted cardboard?
I lightly sanded over the whole surface and then sanded most of the paint away around the corners and edges of the box.
I went to my paper stash and grabbed a Christmas song page from an old hymnal and a cute vintage looking image of a girl with a bird. I tied some white string around it, hinting at the look of a Christmas package. I added a tiny glittered pine sprig, and a rustic metal star.
I really dislike taking indoor photos at night! But what are you gonna do when you have a sudden desire to go to a Christmas party?
I punched a small hole in the back of the box and hung it on a nail inside a weathered white frame.
Why did I suddenly feel compelled to create a Christmas craft from a cereal box at 10:00 at night in the middle of July?
Sometimes blogging makes you do weird things.
Come check out the Christmas party!

See you soon, friends!
Jeanette
Sharing this week over at:
The Scoop at The Farmhouse Porch
Metamorphosis Monday at Between Naps on the Porch
Nifty Thrifty Tuesday at Coastal Charm
Christmas in July
Wednesday, July 10, 2013
Vintage Book Photo Holder

Using vintage books in decorating has sure been a popular trend the last few years. I have collected, and crafted with, old books for as long as I can remember. Long before it was "cool" : )
I recently acquired a few more of these time-worn treasures.
Some from a friend who was clearing out some of her crafting supplies. Some that were put out curbside during a nearby town's clean-up week.
Today I'm going to show you a super simple way to use some of your vintage books to hold photos, postcards, etc.
Now I know a secretary's desk book isn't exactly romantic, but despite the water damage to this book, I just think the cover is so pretty. You may like to choose your books to fit the theme of your photos, or whatever you choose to display. But for today's purpose let's just go with this one : )
Choose a nice chunky book with a wide spine that can sit flat on it's own. You could also bundle several thinner books of similar size together to achieve the same thing.
Choose a pretty ribbon, a piece of twine or burlap-whatever suits the look you like- and tie it very tightly around the book. I used a simple strip of cotton that I tore from a scrap piece of fabric I had.
Stand the book up on it's spine, and simply tuck your photos between the pages. Make sure you've tied the book very snugly so your photos won't slip down between the pages.
Simple as that!
{By the way, that pretty brunette is my grandma, and the lovely curly haired girl is my dear mom, probably late 1940's!}
I love it when we can find a useful purpose for the things we love to look at, don't you?
I hope you're having a wonderful week, friends. I would love it if you would come say hello over on Facebook or visit me over on Pinterest! I'll be back soon with peek at my current creative space.
Blessings-
Jeanette
Treasure Hunt Thursday at From My Front Porch to Yours
Share Your Cup Thursday at Have a Daily Cup of Mrs. Olson
Tutorials Tips and Tidbits at StoneGable
Be Inspired at Common Ground
Feathered Nest Friday at French Country Cottage
Fabulously Creative Friday at Jennifer Rizzo
Home Sweet Home at The Charm of Home
Junkin' Joe at The Cottage Market
Funky Junk's Party Junk
Knick of Time Tuesday
Sunday, May 19, 2013
Adding Vintage Charm in the Kitchen
Recently, on a sunny day in western Colorado, the stars and planets aligned in a once in a lifetime miraculous event and my kitchen was clean enough to take photos!! Can you believe it? Really, it will not likely happen again anytime in the near future, so you will have to bear with my gazillion photos today. I need something happy to look back on when things are out of control over here!
Back in January, I shared a post entitled "Permission to Nest"
where I talked about finally letting myself treat this house as our home.
I was going through a divorce when we (my four kids and I) left the family home my husband and I owned and moved into the town home we currently rent. Up until that point I was just not mentally or emotionally capable of investing myself into decorating (or getting too attached to) a place that may be temporary for us.
Well, we've now lived in this home for almost 2-1/2 years. I still don't know what might happen from one month to the next, but I'm in a place now where I am comfortable investing some effort to make this place feel more like "me", regardless of what might happen next.
So what does all this have to do with my current kitchen?
This is my kitchen the day we started moving in, January of 2011.
What's wrong with it? Absolutely nothing! {except bad photography- haha}
It's a kitchen lots of people would love to have, regardless of how (or whether) it's decorated. It was brand new construction and we were the first to ever live in this home. I truly am blessed to have this kitchen!
The thing is, it just wasn't me. Gosh, I hope this doesn't sound too petty. It's just that after living here for some time, I was finally ready to add a little charm to this quite contemporary space. How did I accomplish a look that's more my style, without looking out of place with the house's style? And how did I do it without spending much money?
I'd love it if you'd come with me on a little tour of my space!
First, please notice my ability to produce a better photograph :)
If I owned this home, I would probably want to paint the cabinets. Since that isn't possible, one of the things I've done is add a few painted pieces of furniture, like this blue stool. There's just something about a painted piece that softens the somewhat "hard" feeling of all the wood and granite. This stool was given to me by a friend when she moved away. In fact there are several things in this kitchen that were gifts from that same friend. Thanks, Dina!
This kitchen has no backsplash. I really wanted something behind the stove because it can get messy back there. The piece that looks like a ceiling tin is actually a plastic material. It's a leftover from the previous house (purchased at Lowe's). I like that it has a vintage look, but still blends well with the contemporary appliances. Plus-I already had it! Now remember, that's the main thing when you're decorating with no budget-shop your own stuff!
To the right of the stove I had an opportunity to add another piece where there is no backsplash. This chippy wood panel came from a curbside antique door (I only managed to get half the door-ugh! Story for another day) I cleaned it and smoothed down the peeling paint by lightly sanding it and then covered it with a coat of polyurethane.
In my humble opinion, ironstone always seems to bridge the gap between design styles. A vintage glass and my grandmother's cow creamer hold measuring spoons.

To the left of the stove I have another small wood plank panel in place of a backsplash. This was another curbside find that I painted white and distressed a bit. I hope I'm not grossing you out with all these curbside things in my kitchen! : )
Here I'm using it with a vintage canning rack holding a plate of apples.
The white cotton chair cover was $1.50 thrift store find, and the feed sack was another freebie.
In this corner I'm using a wooden box turned on it's side to hold my coffee supplies.
I've had this hanging rack for years, and it holds plenty of cups!
This French blue shelf is one of my favorite pieces! I've had it in the master bathroom since we moved in, but I recently decided to move it down here to the kitchen where I can enjoy it for most of my day!

It's kind of fun to make the necessities look pretty. I'm using an ironstone dish next to the sink to hold soaps and scrubbers.
To the right of the sink, a little painted stool that I bought for my son when he was a toddler now holds a stack of oval Homer Laughlin plates (they were 50 cents each at a thrift store)
The white tray I've had for many years. It actually has legs that fold up, so it can be used as a bed tray. In fact, my kids used this to bring breakfast up to my room on Mother's Day.

Not only is this chippy, rusty old advertising thermometer cute, it has sentimental value to me, as well. It's another of many items I'm lucky enough to have that belonged to my dear grandparents.
Baskets are another of my favorite items to add a little warmth to a more contemporary space. Plus they are just great for organizing and storing necessary items, like these kitchen towels.
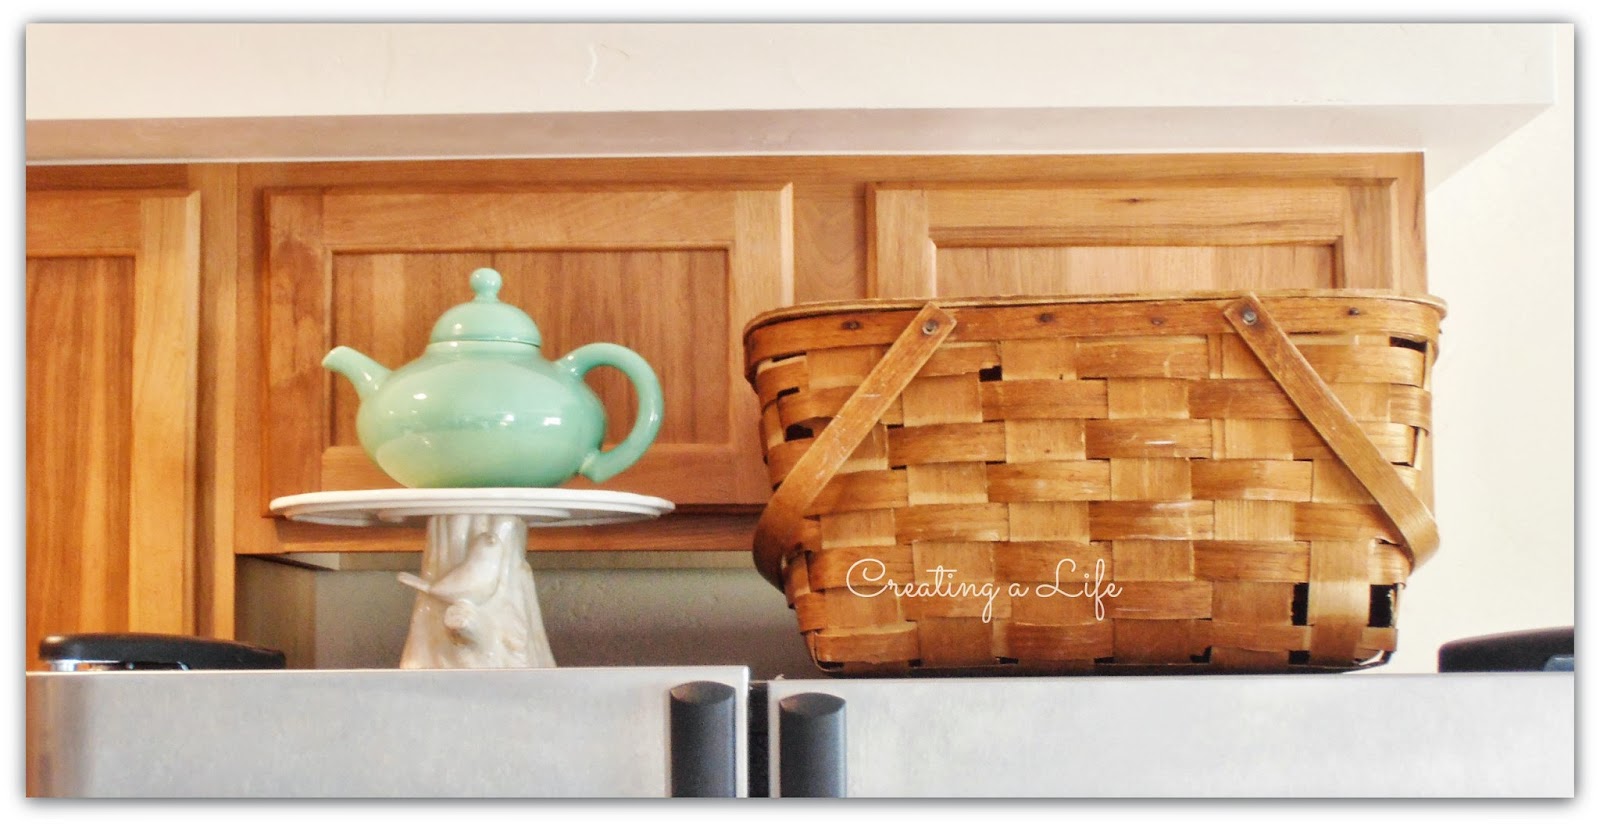
I told you the sweet story of this picnic basket over here.
Can you believe my son-in-law bought me this darling vintage teapot for Mother's Day? I showed you the lovely things my daughter gave me for Mother's Day in my last post, so I was very surprised that he wanted to give me something that was just from him. I love it!

On the average day, this entire island counter is usually covered with papers, schoolbooks and art supplies. I hate to spoil the illusion, but we really do live in this area of the house most of the day long, and it looks really lived in most of the time. It was really good for me to pretty things up and know that it can look nice :)
I pulled together some random thrift store parts to create this large candle holder. The wire base is from a planter I've had for years. The glass part I picked up last year at the local second hand shop. It's beautiful hand blown glass from a hotel light fixture, I believe. They were asking more than I was willing to pay, but I think I talked them into letting me have it for $3.00. I put a round piece of wood in the bottom of the wire basket and placed a candle and the glass piece on top, and voila! I love the way it looks!

At the end of the island counter I have another {you guessed it} curbside find. It was a dark brown planter box when I picked it up. I cleaned it up and painted it and now it holds jars of flatware and utensils. Sometimes math papers...toys...markers...

At the very end of the island counter I've found it's very helpful for a messy crafter like me to keep a small chest of drawers for supplies.
It's another opportunity to incorporate a painted piece, again softening all the hardness of wood and granite with a little cottage charm.
This piece is extra special to me. First, because it belonged to my grandma. Second, because all four of my kids have had this piece in their rooms growing up. When I was expecting my last child, (was that really six years ago?!) I re-painted it, added the red handles and decoupaged some sweet little vintage baby images on the drawers. It's been in my son's room up until about a week ago. I know it's kind of baby-ish for a house with no babies, but I just haven't been able to bring myself to change it yet. You understand :)
View of the kitchen from the living room area.

Whew! I know this was a super long post, and you are all troopers for sticking with me to the end!
I've tried to create a balance, infusing some vintage charm without overwhelming the space with things that are not appropriate for the style of the home. It's become a comfortable place for my family, so I guess that's what's most important.
By the way, the items in the kitchen that were purchased since we moved into this house 2-1/2 years ago total about $25.00 spent.
If you're a vintage-loving person like me, living in a contemporary space can feel a little challenging. I hope I've given you a few ideas about how to incorporate a bit of that charm we love so much into your own home as well.
Thank you all for reading, friends!
Have a blessed week-
Jeanette
Come join me this week over at
Make the Scene Monday at Alderberry Hill
Make It Pretty Monday at The Dedicated House
Metamorphosis Monday at Between Naps on the Porch
Creative Bloggers Party at Homemaker on a Dime
The Scoop
Inspire Me Tuesday at A Stroll Thru Life
Budget Decorating Party at Creative Cain Cabin
Knick of Time Tuesday
Nifty Thrifty Tuesday at Coastal Charm
Tweak It Tuesday at Cozy Little House
Pretty Things at twelveOeight
Wow Us Wednesdays at Savvy Southern Style
Tutorials Tips and Tidbits at StoneGable
Share Your Cup Thursday at Have a Daily Cup of Mrs. Olson
Creative Inspirations at Embracing Change
Transformation Thursday at The Shabby Creek Cottage
The Weekly Creative at Reasons to Skip the Housework
Feathered Nest Friday at French Country Cottage
Be Inspired at Common Ground
Home Sweet Home at The Charm of Home
Party Junk at Funky Junk Interiors
Subscribe to:
Posts (Atom)