Related Posts Plugin for WordPress, Blogger...

Tuesday, December 10, 2013

Vintage Inspired Bottles


I just realized something today.

I've been a bottle collector for 40 years!

I have always always loved pretty little glass things, but to my recollection, my love of pretty bottles began when I was in 4th grade. My teacher had a tiny blue green bottle, shaped like a "genie bottle", and I fell in love with it. 

Well, I can't recall how it came about {I may have pestered her mercilessly} but she ended up giving me that little bottle and I thought I had been bestowed with the most amazing treasure in the world. Seriously. 

I still had that little bottle up until a few years ago, and now I'm so sad I let it go! 

Yes, I promise to seek psychological help soon ;)

Forty years later, I'm here to share some easy ideas for creating home and holiday decor using old (or new) bottles and some items you probably already have around your home and in your junk stash. 
Come on, you know you have one.


Although I did not drink the contents of these amber brown jugs, I was more than happy to receive them from a family member for all manner of craft-y purposes. 
You can see how I used some of these for Valentine "Love Potion" bottles back in January here.


You may recall seeing these in our Nature Inspired Foyer.
I simply pasted a vintage bird image, and the front panel of a note card with a pine cone, onto the brown jugs.


To give them a little update for our winter decor, I used vintage glass glitter to add a little frosty sparkle to them


To one, I added a glass stopper from a vintage decanter, and to the other I added a glass door knob as a stopper. This is such an easy way to add one of a kind pieces to your decor without spending any money!


I created some brown bottle ornaments, that are also pretty on a mantel or incorporated into your other seasonal decor.


I decoupaged vintage sheet music stamped with a bird to this bottle, layered with a smaller cherub image. I added a glittery star, a hand stamped "hope" tag, a white cotton scrap ribbon and a metal wire loop so the bottle can be hung on the Christmas tree if desired.


I used a strong adhesive to glue white enamel drawer pulls to the top of the bottles.
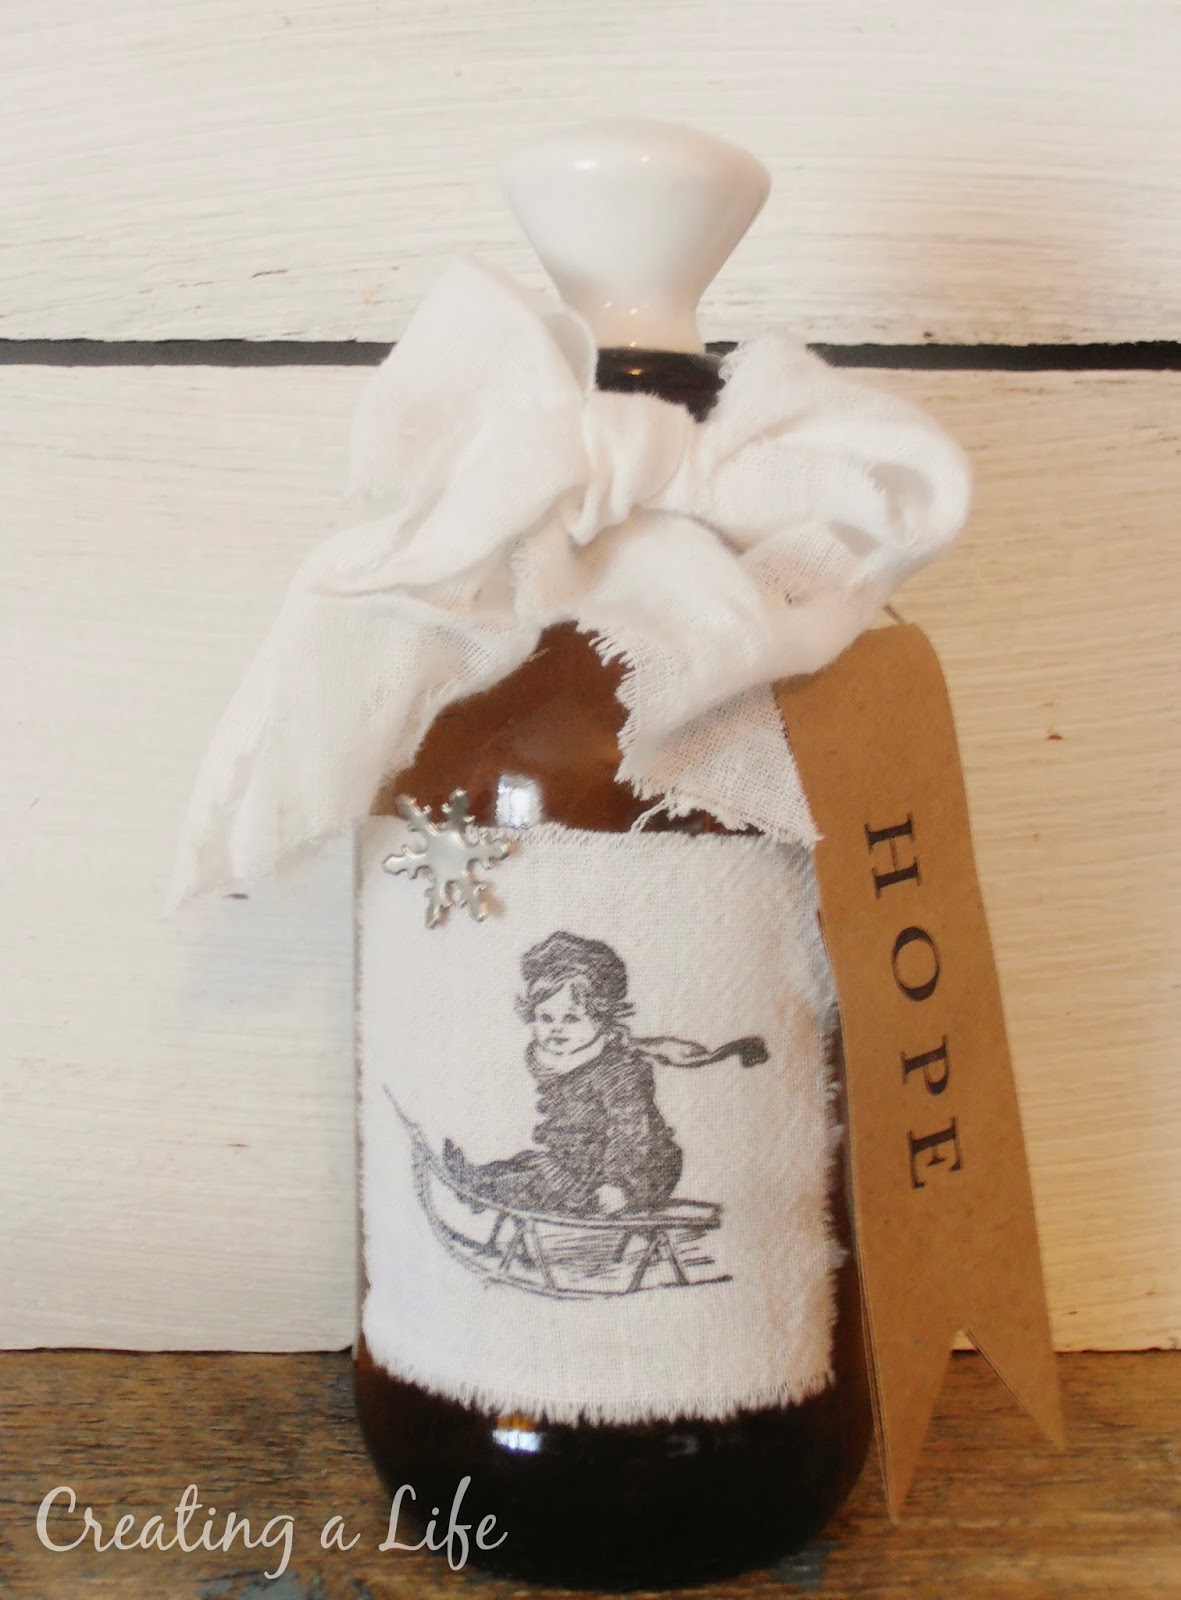


Some I embellished with pieces of hand stamped cotton fabric, metal snowflakes and glitter stars.


I really love the old fashioned look of the brown glass with the white enamel top!


I almost like the plain side better. Hmm...


With this clear glass round bottle, I made a little snow globe style decoration. 


It's filled with Epsom salts for 'snow', a tiny Christmas tree and some sparkly little jewels and stars.


I added a cork to the top and created a little cardboard flag with a vintage style snowman sticker, and a tiny jingle bell at the top. 


This last one is another brown bottle, this time with a vintage style Father Christmas holding a glittery star.


I found several glass stoppers for spice jars in my "stuff" and decided to dress one up a bit by gluing a glass door knob to the top of it to make a more substantial top for this bottle. It doesn't really fit snugly in the top, but I love the way it looks!


These are just a few of the ways I've embellished bottles in my forty year bottle hoarding 'career'. :)

Some of these are available in the shop, but some are staying put in my winter decor for now. 

I hope I've given you a little inspiration for some things you might create this season with items you may already have in your crafting supplies. 

December is flying by too quickly-eek! See you all soon!

Jeanette

Come party with me over at
What's It Wednesday at Ivy and Elephants 
Be Inspired at Common Ground 
Home Sweet Home at The Charm of Home 
Feathered Nest Friday at French Country Cottage 


http://creatingalifenow.blogspot.com/2013/12/easy-chicken-and-biscuits-with.html

Yummy and simple Chicken and Biscuits with Campbell's soup! Click the photo for the recipe, plus links to many more easy and delicious meal ideas. 


Monday, December 9, 2013

Sweet and Simple Christmas Dining Room

Happy Monday, all! 

I don't know about you, but I have been blown away by all the gorgeous Christmas decor and home tours in blogland this past week! 
I have barely scratched the surface of all the lovely homes being shared, but I'm steadily working my way through all I can get to. I don't want to miss anything!


In my last post, I showed you how I put together the world's quickest "cheater chalkboard". You can see the details of how I did it here.

I promised to show you which space I used this is in, and here we are.

 Welcome to our sweet and simple Christmas dining room!


If you've been following for awhile, you know that we are going to be away from our Colorado home for Christmas for the very first time ever this year! 

We don't want to miss out on all the magic of making our own home a little Christmas-y before we head off to California for the holidays, so we are adding some festive touches here and there throughout the house. 
It will be cheerful, but not overwhelming, to come home to after a long trip ;)

I really appreciate you coming by to visit our sweet and simple Christmas dining room today! 

I'll have a few more holiday details to share with you this week, so I hope you'll come back soon!

Blessings-

Jeanette 

Sharing this week over at
Make it Pretty Monday at The Dedicated House 
Between Naps on the Porch 
Knick of Time Tuesday 
The Scoop 
Creating Christmas at Junk Chic Cottage 
Inspire Me Tuesday at A Stroll Thru Life
Tweak It Tuesday at Cozy Little House 
Nifty Thrifty Tuesday at Coastal Charm 
Wow Us Wednesdays at Savvy Southern Style 
What's It Wednesday at Ivy and Elephants 
Treasure Hunt Thursday at From My Front Porch to Yours
Be Inspired at Common Ground 
Home Sweet Home at The Charm of Home 
Feathered Nest Friday at French Country Cottage 


Thursday, December 5, 2013

Christmas Cheater Chalkboard


Hello, has anyone seen my van? 


Yep, it was this kind of day here in Colorado. Not only lots of snow on the ground, but bitter cold temperatures to boot. I'm so glad I didn't need to be anywhere today!


I know this is silly, but I just love this lamp post next to our driveway. I can see it from my bedroom window, and when it's all covered with snow like this, I just think it's the cutest thing. 
A little weird, I know : ) 


Okay, on to today's project-  a super speedy "cheater" Christmas chalkboard!

You know how it is. 

Sometimes you're working on a space and you need something for a certain area or wall. 

You realize you don't have "the something" you want for that space. 

You know you're not going to buy something for the space. 

Certainly you can MAKE something for that space, right? 

Right!


I've mentioned here before than you can create a chalkboard-like surface on just about anything by simply painting it with black craft paint, and that's exactly what I did with this piece.

This past summer I made some chalkboard style signs for a friend's wedding. What I used for the painted chalkboard style surface on one of the signs for the drink station (hence the water stains) was an ugly old oil painting that I picked up from a 'free' pile after a yard sale. I simply painted over it with black craft paint, 'seasoned' the surface by rubbing chalk over the entire surface and then erasing it.

Yes, apparently I did watermark a photo of an old water stained piece of cardboard. : )


I've had this chippy white frame for some time. I don't really remember, but it might have been a curbside freebie, as well.


I decided I would create a framed Christmas cheater chalkboard for the area I was working on. I cut the piece of black painted cardboard to fit the back of the frame, and hot glued it in place. 


Boy, the photos just get more attractive as we move along, eh? 

I think I must have seen on Pinterest some time ago that you can use soda can tabs as picture hangers. Brilliant! A friend gave me a whole bag of these recently, so I decided I would use one for this project. 


I decided to hot glue the tab to the frame because:

1) The glue gun was already plugged in 
                               and
 2) I was too lazy to go find the screw gun and screws at that     
     moment       

It's really very light, so I'm sure (hoping) the glue will be just fine.


Do you like my epic chalkboard lettering skills? haha
Really, I was just going for a "homespun" look.  


Home Sweet Christmas Home- ironic because we won't be home. But we'll all be together and that makes wherever we are a sweet Christmas home, right?


I tied a thrift store plaid scarf into a bow and attached it to the frame with a thumb tack.


I was able to create just what I was looking for to finish this space without spending any money and in, literally, just a few minutes. 

I really love that. 

I am overwhelmed by the astounding number of beautiful Christmas home tours that are going on in the blogging world right now!

I may or may not get a holiday home tour posted before we leave for California, but this week I will show you the space I created the cheater Christmas chalkboard for, okay? 

I hope you'll come back for a visit soon. Thanks for reading, friends!

Jeanette 


Sharing at these wonderful parties this week

Share Your Cup Thursday at Have a Daily Cup of Mrs. Olson
Be Inspired at Common Ground
Home Sweet Home at The Charm of Home
Feathered Nest Friday at French Country Cottage    
Party Junk at Funky Junk Interiors