Related Posts Plugin for WordPress, Blogger...

Thursday, October 31, 2013

Nature Inspired Fall Foyer {Pt. 2}- The Stairway


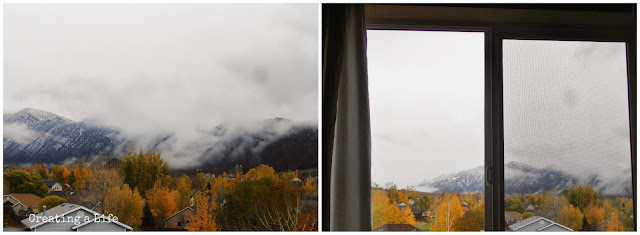
As I sit in my living room writing this post this afternoon, this is the view from my window. Brrr!

All that cold sure makes for a pretty view though, right? 

If there's anything prettier than fall trees in all their glory, it's fall trees with a bit of snow in the background. 

 Just gorgeous! {she says, from her toasty living room}


In my last post I welcomed you in out of the cold into our Nature Inspired Foyer.


As you step into the entryway, the stairs are straight ahead. When we moved into this home I saw the grand potential of this 2-story wall along the stairs. Oh, the possibilities for this expansive space!


I've had visions of a gallery wall of family photos, and my kids' framed artwork. Or how about one or two giant handmade pieces?


Fast forward nearly 3 years (!) and the wall was still a big blank canvas of potential. Knowing I didn't have the supplies on hand {or the cash} to create some of the ideas that have been spinning around in my brain, I figured I'd finally just get moving on creating something with things I already have around here.


After picking through my junk, I decided to use three unique, but similar, wood pieces as a starting point to add some interest to this stairway wall.

I started with the chunky wood piece that sort of looks like a section of fence. This was a curbside freebie I picked up last spring. I recently tried using it as a doormat on my simple Fall front porch, but ultimately decided I was too likely to trip on it!


One top of each of the white wood pieces, I layered three identical rustic frames {thrift store purchase, several years ago}, and placed a simple collection of items from nature. In this first frame, a feather and egg.


Heading up, the second white painted wood piece I used is the lid from a toy crate that once held some sort of a building set. The toys are gone now, but of course I just knew the crate would be useful for something
Again, layered with a rustic frame, this time framing a fall leaf and an abandoned wasp's nest I found outside our home.   


 The last white painted wood piece I used is an old cabinet door from when we remodeled our kitchen at our last home. Why do I still have this cabinet door, you ask? Uum... well... I knew I'd need it as wall decor some day? 

Anyway, now it is wall decor. Layered with the last rustic frame, an acorn and...


...this cute little guy I swiped from my daughter's toy animal collection. 

What I really like about this set of layered frames is how easy it will be to change out the items inside the frames whenever the whim strikes me! 


On the upper stairway wall I hung a large canvas with the frame side out. I bought the canvas at a thrift store a couple of years ago for around a dollar. 
Someone had spray painted something decidedly unattractive on the front, but I have painted over it more than once, most recently as a sign for a friend's wedding this past summer. 


I like the "deconstructed" look of the back of the canvas, and simply tacked a fall branch to it (sorry, blurry photo)


What is this? Well, it's a vintage beach chair that I turned into a beach-y towel rack some time back.

Sometimes when you need something for a certain area of the house, you just have to swipe something from another space, right?

I just covered over the beach print with a piece of an old canvas bag and placed one of my upcycled paper wreaths over it on a vintage hanger. 


{before. well, I mean after it was a chair}


When you are on the stairs, this is what you see out the upper window. At least for a bit longer, until all those beautiful leaves disappear!


This antique suitcase was a recent thrift store find. I'm still deciding if I'm keeping or selling.
At least for a little while it will look cute here on the landing ; )


I was able to add some much needed personality to this space {without spending any money} by using items I already had, and pulling in simple pieces from nature.

I only wish I'd done it sooner!

I'm so glad you came by today. Being able to share our home with you adds so much joy to every project! It just wouldn't be the same without you. 

Blessings-

Jeanette 


See you over at...


Tuesday, October 29, 2013

A Nature Inspired Welcome-The Fall Foyer {Pt.1}


It was a breezy, warm and gorgeous Autumn day here in Colorado yesterday. It was nearly 70 degrees and the sky was the most beautiful blue and the leaves just swirled through the neighborhood all day. Perfection!


When I woke up this morning it was snowing. 

I learned a saying when I moved to Colorado nearly 20 years ago, and it has proven to be so very true. 

"If you don't like the weather in Colorado, wait 5 minutes and it'll change." 

Yes, indeed.


Recently, I shared our Simple Fall Porch with you. 

Today I'd like to invite you to step inside to get warmed up with me!


With some simple {I do like that word} nature-inspired items, I've cozied up the foyer and stairway that immediately greet you upon entering our home.

You may want to grab your coffee or tea and get comfortable. I have a lot of photos today.

Come on in!


The main level of our home is fairly small, but I love that the foyer ceiling extends up to the second floor. The upper window adds so much light and the high ceiling gives a sense of much more space than there really is.


In my last post, I showed you this coat rack I made from part of an old crib panel and some vintage date nails. 

Hanging right inside the door, it's the perfect spot for all the scarves and jackets you just might  {or might not!}  need at this time of year.


This chicken wire bin is never really empty. It's usually full of the books that are ready to be returned to the library, mail, and things I want to remember to return to someone as I'm heading out the door!


This old dresser has been all over the house, but here in the entryway for some time now. It still mostly holds my daughter's artwork and supplies.


I have always loved bringing branches, pine cones and other items from nature into our home as seasonal décor. 

But I do also love a bit of sparkle!


This iron candle sconce was a thrift store find last Spring. I decided it was ready for a little dressing up. I glued rings to the underside of it and added some chandelier crystals. The rings still need to be antiqued to match the iron. It's on "my list". 


I hung the iron sconce on an old window that's backed with pieces of a vintage feed sack.


I love mixing rustic items with a little tarnished silver and some sparkle. Throw in some fall leaves and a pine cone or two- perfect.


I shared this photo of my silver tray over on my Facebook page last night. I am not ready to say farewell to October! Sigh..

I am known for misplacing my keys. Often. I'm going to try hard to just keep laying them on the pretty tray so they're easy to spot : )


This darling little candle snuffer was a birthday gift from my daughter.


These brown jugs (thank you, son-in-law) became fall-ish looking containers by simply gluing the pine cone card and the sweet bird print from The Graphics Fairy to the front of them, and adding a fall branch. 


I really wanted some white pumpkins this year, but I haven't managed it yet. 

I don't remember what sort of squash the little one on the silver container is, but it was the only one of it's kind at the grocery store. My son thought it was so cute, we just "had to" bring it home, right?


It's sort of bumpy with lots of imperfections. That's probably why we like it so much.


You can see the full kitchen tour HERE

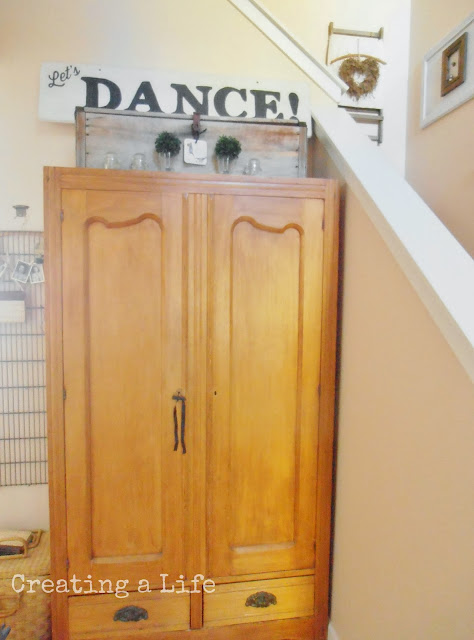
As you enter our home, the kitchen is to the left, the stairs are directly ahead and in between is a small, sort of vestibule-type area.


In this area is a large pine armoire that is one of my favorite pieces.

Like most of my pieces, this has served many purposes over the years-including holding linens, being filled with books and now, mostly holding shop items for The Penny and the Pearl.


I made this large wooden sign for a friend's wedding reception this summer.  I thought I would sell it, but here it still sits. Another thing on "my list"...


On top of the armoire, little vintage glasses with faux boxwood balls, glass insulators and vintage bottle with a nest topper. Tied to the old farmhouse tool chest, one of my handmade book page tags.


I'll be sharing the stairway in an upcoming post. 

Thanks for coming in out of the cold with me, friends! What are you doing to stay cozy at your place? 

Blessings-

Jeanette 


See you over at...
Wow Us Wednesdays at Savvy Southern Style 
Treasure Hunt Thursday at From My Front Porch to Yours 
Share Your Cup Thursday at Have a Daily Cup of Mrs. Olson 
Tutorials Tips and Tidbits at StoneGable 
Be Inspired at Common Ground 
Home Sweet Home at The Charm of Home 
Feathered Nest Friday at French Country Cottage 
Fabulously Creative Friday at Jennifer Rizzo 
Creative Things Thursday at The Vintage Farmhouse
Party Junk at Funky Junk Interiors  
Make It Pretty Monday at The Dedicated House 
Metamorphosis Monday at Between Naps on the Porch 
The Scoop 
Inspire Me Tuesday at A Stroll Thru Life 
Nifty Thrifty Tuesday at Coastal Charm 


Sunday, October 27, 2013

Hanging Rack for the Entryway

Before we went to California, I bought a set of these cool vintage date nails from the Knick of Time Etsy shop.


I recently used this image in the post I did about my 49th birthday. Pretty awesome coincidence that she just happened to send me the 49 : )

I've been following Angie's blog and shop for over a year and her creativity is always inspiring. She's one of my "junk idols"!

I wasn't exactly sure what I was going to use them for, but recently it became obvious to me that our entryway needed some t.l.c. and a little organization. I decided to use the date nails to create a hanging rack out of the top piece of a vintage crib panel. 

I picked up two curbside crib panels several years back. One became a chalkboard {currently in my living room} 


The other one I took apart and used some of the parts to make the backdrop for my electric fireplace. I was left with this top section and the center panel (I have a plan for that, too).


I attached two D-ring hangers to the back. I pre-drilled the holes for the nails a bit so I wouldn't crack the wood, then carefully hammered them in until they felt firmly in place. I didn't get the angles all perfectly matched, but you know that doesn't bother me.


Super easy! My son is a little bummed because he thought I might be using those nails for some hanging space in his room, though. Who knows, maybe I'll get another set. ;)


I'm loving our new hanging space in the entryway. Now to figure out how to handle the ever-present pile of shoes-hmm...

I'll be sharing the rest of the entryway and stairs area in my next post, so be sure and come back soon.

Thanks so much for reading, friends!

Jeanette


Sharing this week at these fun gatherings: