Related Posts Plugin for WordPress, Blogger...
Showing posts with label family. Show all posts

Sunday, August 25, 2013

You Are My Sunshine


 Jim and Kathleen met when they were in the 10th grade. Jim recently described the first time he saw Kathleen as, "wowee!! kazow!!" Does that mean 'love at first sight?' : )


They just "clicked" from that first moment. They dated through high school and went to the prom together. When they were 17 years old Jim called Kathleen and sang to her over the phone-

"You are my sunshine, my only sunshine. You make me happy when skies are gray. You'll never know, dear, how much I love you. Please don't take my sunshine away." 

Kathleen cried, and it became their "forever song".


They married in 1958 in a double ceremony with Kathleen's twin sister and her sweetheart. {Jim and Kathleen on the right}


All these years later, Kathleen still cries when Jim picks up his guitar and sings these words to her!


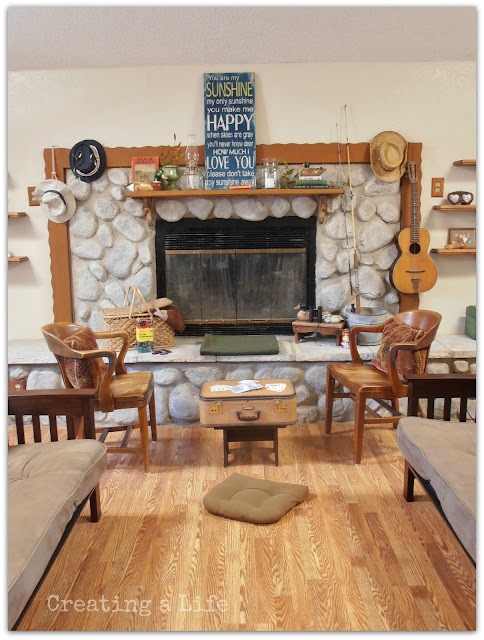
You've probably figured out by now that Jim and Kathleen are my dad and mom. When mom told me recently that she was looking for a sign with the words to their song, I knew I could make one for them. Don't hold your breath for my tutorial, because I did not make this : ) I hadn't told her I could make it, I was going to do it as a surprise when we got here to California. But when we arrived, she had already purchased this awesome metal one, and it was hanging in their dining room in a spot that wasn't easy to see.


When I was growing up I made my parents crazy when I wanted to rearrange furniture or change the knick-knacks. See, it starts early :)


 So this past week, they were super generous to let me re-style the family room fireplace and mantel with a little fall-ish look. Not an easy task to find "fall-ish" in southern California in August! I used  their new sign, some cool vintage stuff from around the house (and garage, and shed) some of my dad's old fishing rods and hats and even managed to find a few branches out back that had a fall look to them .


My mom has a very large collection of wooden ducks so I had lots of those to choose from for my theme.


I pulled a couple of wooden chairs from another room in front of the fireplace to create a little game area. 


 Anyone recognize this little suitcase I blogged about recently? My daughter and I really didn't squabble much over it. I ended up packing shoes in it : ) 
Here, I put it on top of the stool my brother made in high school to make a little game table.


Before we arrived, this room had been pretty much unused for quite some time. My parents were so gracious to get two new futon sofas for us to sleep on {super comfortable, by the way!}

It was fun to fix things up a little and hopefully be able to leave the space more usable for them. By the way, that pretty antique dresser with their wedding photo in the first picture is also in this room, opposite the fireplace wall.


After some cleaning and rearranging, this is what I started with.


And the cozy, slightly fall-ish after. Just some subtle changes, but a warmer feel. 


Mom and Dad are about to celebrate their 55th wedding anniversary in a few weeks! Sadly, my dad is fighting a very serious cancer. After my mom losing her mother and twin sister to cancer some years ago, you can imagine the fear of losing my dad, too.

My dad says, "from the first time we saw each other we just clicked, and we're still clickin'-just a little slower." : ) 

We'd love for them to keep clickin' for a long time to come. They have a very strong faith, but your prayers for them would be appreciated so much, my friends! 

Blessings to you-

Jeanette 


Sharing this week over at:

Inspire Me Tuesday at A Stroll Thru Life
Inspiration Monday at twelveOeight 
Metamorphosis Monday at Between Naps on the Porch
Nifty Thrifty Tuesday at Coastal Charm  
The Scoop at the Farmhouse Porch 
Wow Us Wednesdays at Savvy Southern Style 
What's It Wednesday at Ivy and Elephants 
Tweak It Tuesday at Cozy Little House 
Share Your Cup Thursday at Have a Daily Cup of Mrs. Olson
Tutorials Tips and Tidbits at StoneGable  
Be Inspired at Common Ground 
Party Junk at Funky Junk Interiors 


Wednesday, February 20, 2013

Don't Let It Slip On By.....

This week we lost two young people in our community, in the blink of an eye. 
I didn't want to do another blog post without acknowledging Kellie (18) and Malachi (20).


This song is a bittersweet reminder to pay attention to the time we're given. No one is guaranteed tomorrow. 
If you are a praying person, could I ask you to take a moment to lift up their family and friends? Please pray for comfort and healing as life just inches forward. 

Love to you, my friends!
    Jeanette

Friday, February 8, 2013

Valentine Love Note Station


Every year for Valentine's Day, my kids and I make cards for each other. Nothing wrong with that. Some years it has been all I could do just to direct them in that small effort. 

This year, I thought it would be nice if I had a little more of a firm plan for helping my kids let each other know just what it is that they love and appreciate about each other {and their mom, too!}


I decided to set up a Love Note Station. I wanted to make an easy "destination" we will take turns at once a day until Valentine's Day. 


We can sit down and pick up a paper heart from the bird dish, or the message board, and just write one thing (or more!) about each family member that we love and/or appreciate that day.

 I showed you recently how I used a pretty kleenex tissue to print paper to use for some heart shaped notes.
 We also used some leftover red and white polka dot Christmas wrap to make heart shaped note paper.


After we write our notes {my five year old will need help from mom and sisters, of course} we will put them in our love note box.

We've already had a bumpy moment when my 9 year old just couldn't bring herself to come up with something nice to say about her 15 year old sister who had hurt her feelings. Sigh. We'll be working on that... {they really are great friends!}


 It was fun working on this together with Amelia! We started with an empty cereal box. We cut it in the shape we wanted and she glued some vintage sheet music love songs all over it. We cut a separate heart out of another cereal box and glued sheet music to that and stuck it (glue stick) to the front of the box.


Finally, I stuck on a couple of hearts cut out of red craft felt.


On Valentine's Day, while we are enjoying something sweet together, we're going to take out all of our hearts and read them out loud to each other.  


We have lots of "togetherness" in this family, and sometimes (many times) that means conflict. I'm really hoping that if they put some effort into seeing the good in each of their family members each day, those conflicts we be easier and quicker to resolve. A mom can hope, right? 

What are you appreciating about your loved ones today? I hope you will take a moment to let them know. 

Friday blessings to you, my friends! 


Sharing over at:
Common Ground- Be Inspired! 
Diana Rambles-Pin Me! link party 
Funky Junk Interiors-SNS Valentines! 
Fox Hollow Cottage- Power of Pinterest
Craftberry Bush-Inspiration Gallery  
Alderberry Hill-Make the Scene Monday 
Homemaker on a Dime-Creative Bloggers Party Hop
Cozy Little House-Tweak It Tuesday  
The Dedicated House-Make It Pretty Monday
Decor to Adore-Valentine Link Party  

Monday, November 12, 2012

Aspen Wedding on a Budget

My daughter Tess and her hubby recently celebrated their VERY FIRST wedding anniversary
This weekend I was going through photos and reminiscing about their day. One of the first things that comes to mind for me was that day in September 2011 when they decided to toss the original "big wedding plan" that would have taken place this past summer, opting to put together a smaller wedding with just family and close friends (around 35 of us altogether) Much sooner. Like... IN 30 DAYS. My daughter had her heart set on trying to have an outdoor wedding and in Colorado there's not much of a chance of that past October, and they just decided they didn't want to wait anymore to begin their married life together.  

Talk about brain scramble-ghaaa! With a practically non-existent budget, a DIY spirit, and the help of dear friends and family, we pulled it together! It turned out to be a lovely celebration, full of personal and meaningful touches and plenty of sentimental details. I hope you enjoy seeing how we did it and maybe you'll find some inspiration for your own DIY celebration!


First, the location:
Why Aspen?  (about an hour from where we live) After all, Aspen and "affordable" aren't exactly synonymous. Well, the kids got engaged there, so there was a sentimental attachment. We looked at every outdoor location possible, and decided on this beautiful location- Hallam Lake at the Aspen Center for Environmental Studies. 
 We chose it because it had a gorgeous lakeside location for the ceremony, a large deck just outside the nature center, and most importantly, we could also have the ceremony inside the building if the weather didn't cooperate PLUS they were totally cool about us waiting until the very last minute to decide. Perfect!


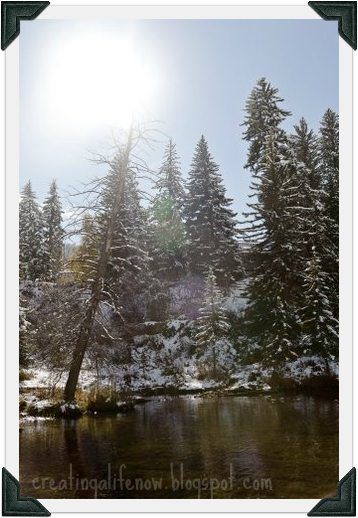
Unfortunately, the NIGHT BEFORE the wedding, Aspen got 6 inches of snow! The day of the wedding the temps in Aspen hit a high of about 45 degrees. These photos show what it looked like when we arrived that day. Tess had to give up her dream of an outdoor wedding, but she was a trooper and just went with the flow. We focused on the pretty features of the building, like the high ceiling, the beams and the pretty skylights.
 Beautiful, but....brrrrr


 Magical setting!


We decorated with very simple diy white tissue pom-poms tied up with white yarn.

I have to say the staff at A.C.E.S was so kind and helpful to us! They just couldn't have been more accomodating, even offering us extra space upstairs to dress and get prepared. Plus they provided all the chairs. The cost of this lovely Aspen location? $200.00 for three hours! 
By the way, that's my dad in "action mode" back there. Can you believe that he and my mom drove all the way here from California on really short notice so he could walk Tess down the aisle AND play guitar in the ceremony?? Mom and Dad, you're the BEST!
                                            
Next, the all-important DRESS!: 
So, Tess is a well-trained thrift store shopper. Thank you, thank you-no applause necessary : ) Before they changed to the speedy wedding plan, she called me from the thrift store one day to tell me she found a gown and veil with the original David's Bridal tags attached-$799.00 for the dress and $125.00 for the veil. She hadn't asked the store for their price yet, but she assumed it was still going to be more than she could afford. She wanted to know if she should even bother trying it on, risking falling in love with a dress she couldn't afford. I suggested she go ahead and try it and call me back. A short time later she called to tell me she not only really liked it, but the woman at the shop let her have the gown AND the veil for $20.00 together!! I'm pretty sure that was an angel at the counter that day.....

It was too big for her, but at that price we knew we could have it altered and still stay on budget (what budget?) The entire gown was covered with sequins and tiny pearl beads and she really wanted just simple lace on the skirt and train. The veil had sequins on the edge also, which she wasn't crazy about. 
Don't cringe now, but I spent a couple of days removing all the sequins and pearls from the bottom half of the dress, leaving just tons of soft beautiful lace. I carefully trimmed the sequined edge from the veil and stitched on a few of the tiny pearls from the dress. It cost $90.00 to have the dress altered to fit perfectly, bringing the grand total to $110.00 for a $925.00 gown and veil!


Stationary & Flowers:
In keeping with our shoestring budget, Tess gave me the go-ahead to design their invitations. I started with a vintage postcard that I've had for quite some time. 
I added black photo corners and an autumn-themed stamp where the postage stamp would go. I used a Fall leaf that Tessa brought home from Aspen for me the night she got engaged (aaw) and a section of a hymn that was meaningful to her. I did a sort of paste-up on light brown cardstock leaving space on the side for a wide lace ribbon she wanted to have added. I took it to the local copy shop to be printed and got some nice black card stock to mount it to. I think all totaled the set-up and printing (25 invitations), the lace ribbon we already had, the black cardstock and envelopes from Target cost under $40.00! No, it's not "fine" stationary, but it was created with love and it's a one-of-a-kind.
I recently did a little project with these oak leaves saved from the wedding decor here
All of the wedding and reception flowers came from the supermarket. If you cannot afford a florist for your event, you must check out the floral department of your local supermarket! They had an abundance of lovely autumn flowers to choose from at wonderful prices. The key here is NOT to pay them to make arrangements for you! We paid about $70.00 for all the flowers (about 2 days before the wedding) and Tess and her girlfriends made all the bouquets, boutonnieres, and darling mini-centerpieces using vintage bottles and my grandmother's silver salt and pepper shakers. So cute!
 
Tess used a vintage handkerchief of her great-grandmother's to wrap the handle of her bouquet, and wore her grandma's pearls.

*A note about the bouquet: Tess had originally asked the supermarket florist for Ranunculus flowers.
Sadly, when they arrived they had been crushed. The store offered to substitute roses they had in stock. The roses were more expensive, but they gave them to her for the same price. Again, she was a trooper and went with what was available. I think she created a lovely bridal bouquet for herself.
 DIY programs printed on our home computer.
 Sweet little handmade bridesmaid's bouquets.

The ceremony! :
Tessa's baby brother (then 4) was the ring bearer.

 DIY bird's nest ring pillow
DIY "Here Comes the Bride" sign, carried by Tessa's little sister
Grandpa beside her, her beloved straight ahead.....
Maid of Honor and Grandpa play/sing "For the Beauty of the Earth" during the unity candle lighting.
Gotta be some tears, right? 
 Followed by lots of smiles!


 New family!
 

 One other money saver for everyone involved-Tess asked her girls to choose their own dresses and just gave them general guidelines for colors and style. They all looked gorgeous! My middle daughter (pretty redhead on the left) found her dress at a second hand shop in Aspen for very little $.
What the heck is so funny?? : )


After the ceremony Tess changed into her reception dress, which was a gift from her Grandma purchased from a darling little shop in Glenwood Springs. They don't have a website, but I found a really great blog post by Victoria Hayden about the shop here: Elizabeth Dean Boutique.         
I guess if you're going to stand in the snow for wedding photos, you might as well wear your baby blue Ugg boots : )


While they finished up photos, my helpers and I zipped off to decorate the reception site at a restaurant about 30 minutes away. I regret that we released the photographer at this point (a budget decision) so only got minimal snapshots from the party. The restaurant allowed us to bring our own tablecloths and decorations and my son-in-law Cory made a great playlist on his iPod that they let us hook up to the sound system in the room we reserved for the party.
The groom's mom did a fantastic job on the wedding cake, designing it to look like a birch tree trunk with Cory and Tessa's initials and wedding date carved into it. It was delicious!
She used a sweet little pair of birds in a nest as the cake topper, along with a mini "Love" flag banner that I made by stamping pieces of cotton canvas and attaching to a silk ribbon.

Instead of a traditional groom's cake, Tessa decided to make two giant homemade chocolate chip cookies for Cory (his favorite) They were a hit!


We asked a friend to create a "guest tree" for us, instead of using a more traditional guest book. Guests stamped a fingerprint "leaf" on the tree and signed their names next to it. I love the way it turned out!


Another friend baked fall leaf shaped butter cookies for favors. We added some fall themed chocolates and a sweet homemade thank you tag.

 
Last DIY detail: My middle daughter and I made ribbon wands with little bells to wave and jingle the bride and groom on their way at the end of the evening. 

 Aaww...there they go : )

Oh. My. Goodness. This post was really long, thanks for sticking with me!

All said and done, I believe the total for the ceremony and reception (every detail included) came in under $2000.00.

Was it totally crazy planning and executing even a small wedding in just a few weeks? You bet it was. But it was also really fun and we'll never forget that crazy month. We couldn't have done it without everyone pitching in to help us, and we are eternally grateful.

It wasn't the quintessential "dream wedding" you might think of, but it was warm and creative and meaningful and it represented the bride and groom well. What more could you ask for? 
Thanks for letting me share a special time in our family's history!

How about you? Have you ever had to pull off an event with not much time or money? I'd love to hear about it!

Blessings~
Jeanette 

Meet me at: Debbiedoo's Newbie Party!
Savvy Southern Style: Wow Us Wednesday!
Embracing Change-Creativity Inspirations! 
Cowgirl Up! Farmhouse Porch 
At the Picket Fence-Inspiration Friday!