Related Posts Plugin for WordPress, Blogger...

Saturday, November 30, 2013

Rosemary Wreath Mantel


Is there such thing as a pie hangover? Mercy!


Our Thanksgiving was really fun and filling {as it's meant to be}. 
We were with family and old friends and our day was filled with lots of great food, laughs, sentimental moments and good memories made. 


 Recently I shared with you how I created this Little Rosemary Wreath, and promised to come back and show you a little vignette I created around it.


I've been using my faux mantel in the living room to photograph a few creations, like my vintage style mini Christmas trees, and some things for the shop.


But, what's wrong with this picture?  haha

Below the mantel shelf, things are looking pretty bare! 
My electric fireplace has been on loan to a friend whose elderly mother was visiting from Texas and needed some warming up, but it will be back soon : )


I really don't use many gold accents in our home, but I think I'm leaning towards some hints of gold this Christmas. 
The gold frame I used around the slate behind the wreath is something I've had forever. 

Think late 1980's with a country Victorian print...later changed out for a wedding photo...recently resurrected from the back of my closet after several years to become "all new" Christmas 2013 decor. ; )


Yes, these are the same brown jugs I used in my Nature Inspired Foyer.


I gave them a little frosty Winter update by adding some vintage glass glitter. I added an old glass doorknob as a stopper on one, and the lid of a vintage decanter on the other.


I tucked a couple of large pine cones into two milk glass containers.


I added a couple of mercury glass style ornaments, and some pearly-gold balls.


In keeping with the nature inspired theme, I placed pine cones on the glass candle holder instead of candles.


An easy, nature-inspired look, pulled together entirely of things I already had, but used in a new way.

Is this "the" Christmas mantel? Maybe. 

Maybe not : )

I hope your Thanksgiving was all you had hoped for. I am truly grateful to YOU for being here, friends! 

Have a wonderful weekend!

Jeanette 


Linking up at these fun parties this week!

Party Junk at Funky Junk Interiors 
Inspiration Monday 
Metamorphosis Monday at Between Naps on the Porch
The Scoop at White Lace Cottage  
Nifty Thrifty Tuesday at Coastal Charm 
Inspire Me Tuesday at A Stroll Thru Life 
Tweak it Tuesday at Cozy Little House 
Wow Us Wednesdays at Savvy Southern Style 
Treasure Hunt Thursday at From My Front Porch to Yours 
Be Inspired at Common Ground 
Feathered Nest Friday at French Country Cottage 


Saturday, November 23, 2013

Little Rosemary Wreath

As I mentioned in my last post {here}, we are going to be away from our Colorado home this Christmas for the first time ever. Yikes!
But, we are super excited to be spending the holidays with our family and friends in California this year. Waking up in my childhood home on Christmas morning, with all of my kids (even the grown ones!) will be a special time, indeed.

Because we'll be gone over Christmas, I'm doing some simple crafting and decorating now so we can feel like we've had a little Christmas magic in our own home before we leave!

 Simple Rosemary Wreath

A few months ago, my daughter and I were cleaning and organizing all the kitchen cabinets. (You'd never know it, now. Just sayin' )
I'm a little embarrassed to say how many containers of dried spices were way way past being usable for cooking. But when I came to a container of Rosemary, I thought it looked too pretty to throw out! Kinda silly, I know. 
I decided to keep it with the craft supplies until I decided what to do with it.

Today's "simple Christmas" project is really the happy result of not cleaning out my kitchen spice cabinet often enough : )


 This isn't a complete tutorial, because I got distracted and forgot to take photos of the last couple of steps! But it's so super easy, you'll get the idea. 

I had in mind a tiny wreath and as I was gathering up supplies I spotted one of my kid's CD's on the counter and it was just the right size to use as a template. I traced around it on a scrap piece of cardboard. No, not a cereal box this time : )


A small jar was a good size for the center circle. Poke a hole in the center circle with a pencil or your scissors. Simply cut around the inside and outside circle with your scissors. 
It's not necessary to be perfect because the edges of the cardboard are pretty well covered when you're finished. Here's where I failed to document the rest of what I did- oops!


First, I coated the cardboard ring with Mod Podge. I think any craft glue would be fine, I just grabbed what was closest. I covered the glued cardboard with the Rosemary and let it dry. 
At this stage, the wreath was looking a little "flat" still. I decided to go over the top of the Rosemary with a thicker layer of hot glue and piled more Rosemary on. That gave me more of the look I was going for. 

As a fun little side note: I discovered today that the symbolic meaning of Rosemary is remembrance, love, loyalty and fidelity. Pretty sweet for Christmas! 
If you're interested in finding out the symbolic meaning of other herbs, I found the information HERE.


I made a tiny banner of brown paper with the word "Hope" printed on it and attached it with hot glue. 

For me, it's a favorite word all the time. 

But especially at Christmastime it symbolizes all that the birth of Jesus Christ means to me. 

Hope for love. Hope for redemption. Hope for guidance and purpose throughout my life. Hope for eternal life with Him when we leave this crazy place! 


Have you noticed how much I love using torn strips of white cotton fabric as ribbons? I don't know what it is. 
I do love a gorgeous velvet or silk ribbon, as well, but there's just something so pretty to me about a slightly shabby piece of white cotton fabric!

As you can see, I created a little hanging ribbon and bow from the torn strips of white cotton. I hung my little Rosemary wreath in front of a chalkboard slate in an old gold frame. I'll tell you a little more about that in my next post, okay? 


I'll be back soon to share a little vignette I created around the Rosemary wreath.

How about you? Have you created anything recently out of something you almost tossed out? 

Thanks for reading, friends!

Jeanette

Joining the fun over here this week:

Make it Pretty Monday at The Dedicated House 
Metamorphosis Monday at Between Naps on the Porch 
The Scoop 
Inspire Me Tuesday at A Stroll Thru Life 
Nifty Thrifty Tuesday at Coastal Charm
Tweak It Tuesday at Cozy Little House 
What's It Wednesday at Ivy and Elephants
Centerpiece Wednesday at The Style Sisters
Share Your Cup at Have a Daily Cup of Mrs. Olson 
Be Inspired at Common Ground
Home Sweet Home at The Charm of Home 
Party Junk at Funky Junk Interiors 


Saturday, November 16, 2013

O Christmas Tree


Yep, I did it. I didn't mean to do it.  Not this early anyway....


It's not even Thanksgiving, and I'm sharing my first Christmas post. I have a good reason, though. Really!


We've had the crafty 'bug' over here for the last few weeks. My kids and I have been making things for the house, making things for gifts and making things for the shop

Making things. Just for the fun of it!


The other night, the "making" turned into a little impromptu Christmas crafting. A little forest of vintage inspired Christmas trees!


Sheets of vintage music form whimsical trees. I simply rolled them into a cone shape, secured them with a touch of hot glue, and snipped a bit of a decorative edge around the bottom. 
Some are topped with sparkly stars punched from an old glittered gift bag.


This one has a tiny flag topper of brown paper, wrapped around a toothpick and topped with a pearl bead.


They were set atop some unique bases which just happened to be in my giant, disastrous pile well-organized supplies ;)

I used an iron piece from an old light fixture, a weathered flower pot (I didn't even clean it -oops!). 


This one is an old cabinet handle with a really long screw. I knew I was saving these for something! : )


Turned over onto a bamboo skewer and tucked into a vintage iron piece, an old tin cone takes on the look of a snowy pine tree.


One little bottle brush tree was glued to a base of old, chippy white wood.


The other was glued to a vintage mold.


The star topper is actually an antique screw-back earring. My grandmother picked up a ton of vintage costume jewelry for craft projects, and this pair came from her collection. 


I placed the little forest of vintage inspired Christmas trees on my rustic board mantel.


I made a little "O Christmas Tree" brown paper banner, printed from my computer, and hung it on the wooden backdrop behind the trees.


And took some pictures for you, my friends : )


For the first time ever, we are not spending Christmas at home in Colorado, so I'm not going to feel bad about doing some Christmas things a little early around here. 
I want to enjoy a little Christmas creating and decorating before we leave home, but the plan is to keep it low-key and simple. 

Remember how crazy I was getting ready to drive 3 kids to California this summer? Yep. We're doing that again. {smile}


How about you? Are you embracing Christmas already, or holding off until after Thanksgiving? I'd love to hear what you're up to!

Jeanette 

Linking up at these fun parties-


Sunday, November 10, 2013

Junk Style Photo Board


A few weeks ago, I took you up the gondola on Aspen Mountain with me and my family, as I celebrated "the big 4-9". 
As I told you then, I am really looking forward to my 50th birthday, but there's just something special about the year leading up to a milestone birthday. 

My forties have included some of the most painful experiences of my life, and I want this last year of being in my forties to be unique and memorable for some happy and fun things! Amen? 


Last weekend my two oldest girls {22 and 16} and I went up to Aspen (my daughter's treat!) for a super fun film/concert event with the band Switchfoot. 

I am a pretty big Switchfoot fan, but nothing compared to my 16 year old. She has admired these guys practically her whole life, and standing shoulder to shoulder with them, singing her heart out was a dream come true for her.
Thank God for being 49 and being able to have a blast at a rock concert with my girls! 

Okay, back down to earth now with a little junk style decor :)


Last week I shared our Nature Inspired Fall Foyer and  stairway.

Today I just wanted to share a last detail in that area, that I didn't mention in the last posts, which is the junk style photo board next to the large pine armoire in the entry area. 


Several months ago I was poking around at one of my favorite thrift stores, and spotted this crusty old industrial style metal shelf behind a rack of clothes. Surely, I'm not the only one who looks behind and under everything in the thrift store? : )

I asked the clerk how much they wanted, and she said she didn't even know it was there! 
"How about a dollar?", she asked. Sold!

I was thinking since I have ZERO shelving in my chaotic mess of a garage that this might be useful. The truth is, this wouldn't even make a dent out there. Sigh..

Clearly, it was meant to be a junk style photo board! This is how I did it:


I slipped a vintage wooden hanger through the end of the shelf.


I attached an old cabinet hinge to the wall to hang it from. Let's just pretend we don't see whatever else was going on back there the day I took this photo, okay? 
The shelf is pretty heavy, and I wasn't sure the old hanger could carry the weight of it without coming apart, so I also added a few screws for extra support. 


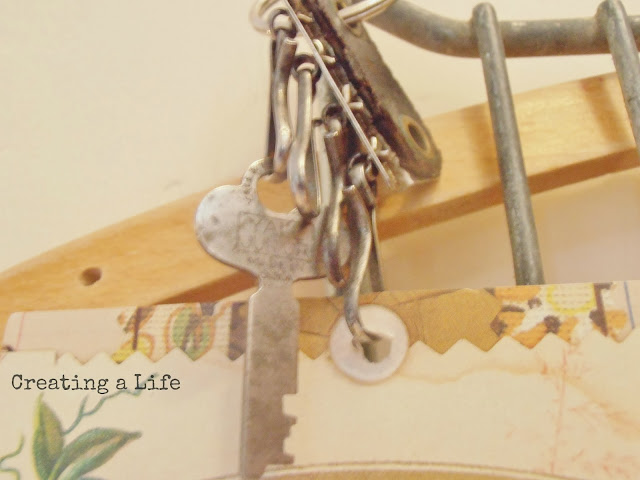
That old key chain belonged to my grandmother. When I was in California this summer, my mom said I could take it, since no one could remember what any of the keys went to anyway!
I hung a favorite Autumn quote from one of the extra hooks on the key chain.


I hung some old book covers with tattered ribbon, and pinned some vintage family photos to the covers with my grandma's antique hat pins. Those little blonde girls on the hay wagon are my mom and her twin sister! She says growing up on a farm has given her some of the best memories of her life.


This old watch also belonged to my grandma {pictured here}. I think I'm going to turn it into a necklace.


I just added a few clips and some twisted wire. I love how easy it is to change up whatever I want to have displayed here! I'm going to use the brackets for another project. 


We are getting in the Christmas mood over at The Penny and the Pearl! We will be listing more handmade and vintage items this week, so be sure and pop over to say hello and see what's new!

I hope you're having a wonderful weekend, friends. I appreciate you coming by for a visit today!

 Jeanette


Linking up at these fun parties-